Setting up a Wireless Microphone


As a DJ, having a wireless microphone can be a game-changer for your performances. It allows you to move around the venue freely and engage with the audience without worrying about getting tangled up in cords.
In this blog, we'll go over the steps to set up a wireless microphone for your DJ console, even if you have a beginner DJ setup.
Step 1: Choose a Wireless Microphone System
The first step in setting up a wireless microphone is to choose a system that works with your DJ console. There are many options available, ranging from affordable to professional-grade systems. Some popular brands include Shure, Sennheiser, and Audio-Technica. Look for a system that has good range and battery life. The model of the receiver may determine what type of technology it uses to transmit signal. The Shure BLX series is entry level and affordable, but the GLXD and QLXD system offer advanced digital transmission and redundancy feeds to prevent dropouts.

Step 2: Connect the Wireless Microphone Receiver to Your DJ Console
Once you've chosen your wireless microphone system, the next step is to connect the receiver to your DJ console. As long as your DJ controller has a dedicated ¼” or XLR port for a microphone, connecting won't be an issue if you have the right cable.
Step 3: Install and Charge the Microphone Batteries
Wireless microphones require batteries to function. There are a few different types of ways to utilize batteries in your microphone. You can use standard batteries like 9V or AAA's which you can either buy new batteries or buy the rechargeable ones which you can recharge after each gig. Either way make sure you have fresh batteries installed in both the microphone. If your microphone has a rechargeable battery, make sure it's fully charged before your performance. It's a good idea to have spare batteries on hand, just in case.

Step 4: Setting the Channel and Test the Microphone
Before your performance, it's important to test the microphone to make sure it's working correctly. Turn on your wireless microphone receiver and use the designated buttons to scan the frequency ranges so it can pick the most optimal channel with the least interference to operate on. Then turn on the transmitter and make sure the microphone is properly paired with the receiver. Test the microphone before the crowd arrives by speaking into it and adjusting the volume as needed.
Step 5: Adjust the Microphone Settings
Once you've tested the microphone, you may need to adjust the settings on your DJ console to ensure it sounds clear and balanced. Use the equalizer to adjust the microphone's volume, tone, and clarity to match your speaking or singing voice. Trim back the low end so your voice is less boomy if you have a deep voice. If your guest is a quiet talker then turn up the gains to accommodate them. Or better yet, coach any presenters before the event so they know to hold the microphone at a reasonable distance from their mouth. Some people are very foreign to public speaking and aren’t aware that this makes a huge difference to get the entire crowd to hear them. Lastly, If your controller has the option (like the Pioneer DJ DDJ REV7) you can even add some reverb to give it a more polished sound.
Step 6: Test for feedback
You may notice that when a microphone gets too close to a DJ Speaker you get that dreaded feedback sound that can ruin any moment at a party. Be cognizant of where those hotspots are (usually right in front of the speaker or monitor) and place your DJ Table and speakers with consideration to where the microphone will be operated. You can even invest in a feedback eliminator like the DBX Advanced Feedback Suppression Processor.
So there you go. Setting up a wireless microphone for your DJ console is a straightforward process if you follow these steps. Choose a wireless microphone system that's compatible with your console, connect the receiver, install and charge the batteries, test the microphone, and adjust the settings as needed. With a wireless microphone, you'll be able to engage with your audience and take your performances to the next level, even if you have a beginner DJ setup. At Astro AVL we have all the tools to get your signal across clean and clear so you’re not distracting the audience from appreciating your awesome DJ skills.
Check out the rest of what we have to offer down below!

March 29, 2023
|
View: 535
|
Categories: DJ Tips
|
Tags: DJ Tips and Tricks, Beginner DJ, DJ Gig, Music Production
|
By: Santana
About the Author


Communication is Key!
September 5, 2023
Mastering the Club DJ Setup
July 27, 2023
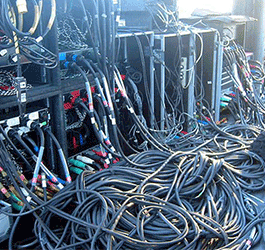
Cable Management for DJs
September 5, 2023
You Gotta Adapt!
September 5, 2023
Mastering the Basics
July 11, 2023
Communication is Key!
September 5, 2023
You Gotta Adapt!
September 5, 2023
Cable Management for DJs
September 5, 2023
Mastering the Club DJ Setup
July 27, 2023
Break it Down with Serato Stems!
July 27, 2023
Comments